In brief
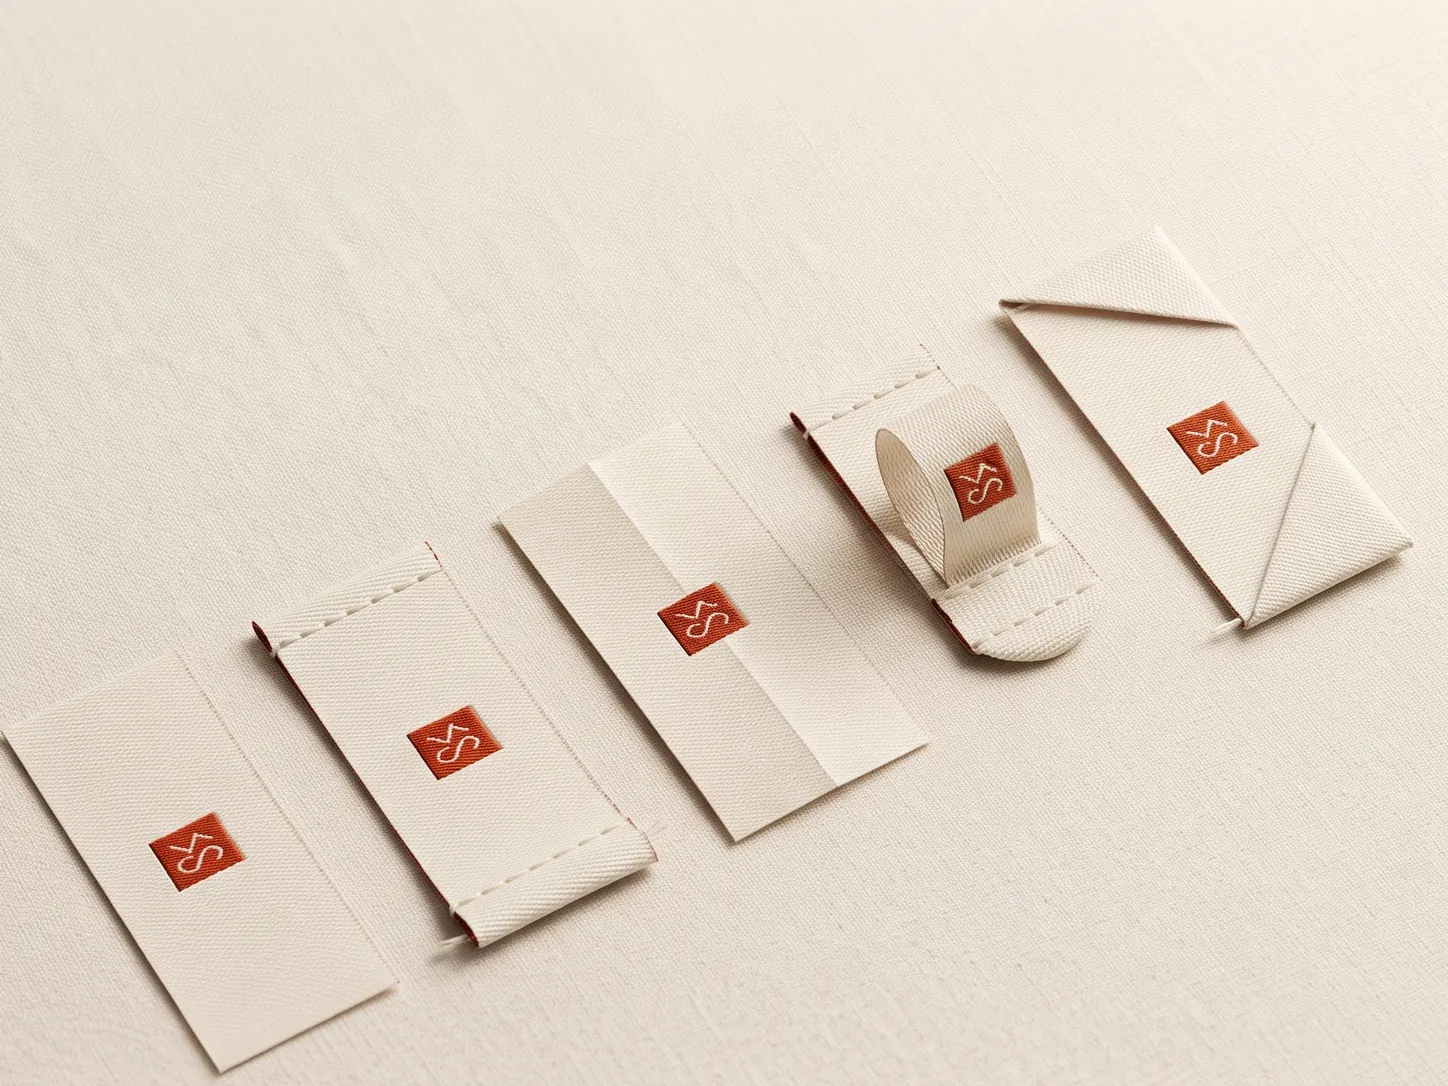
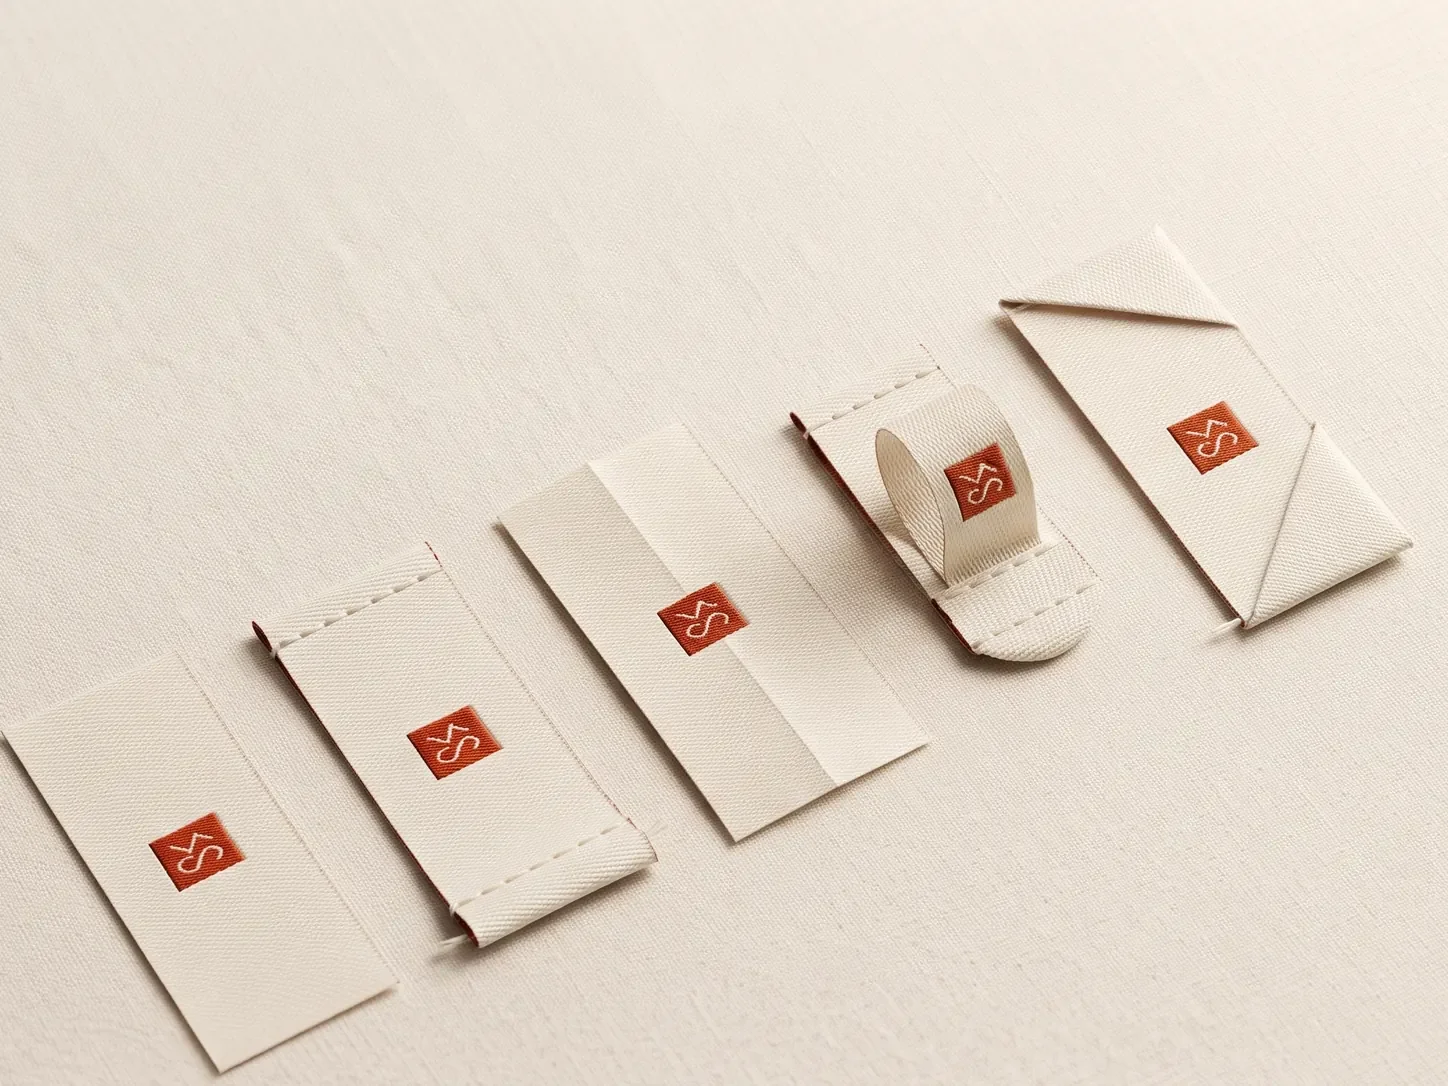
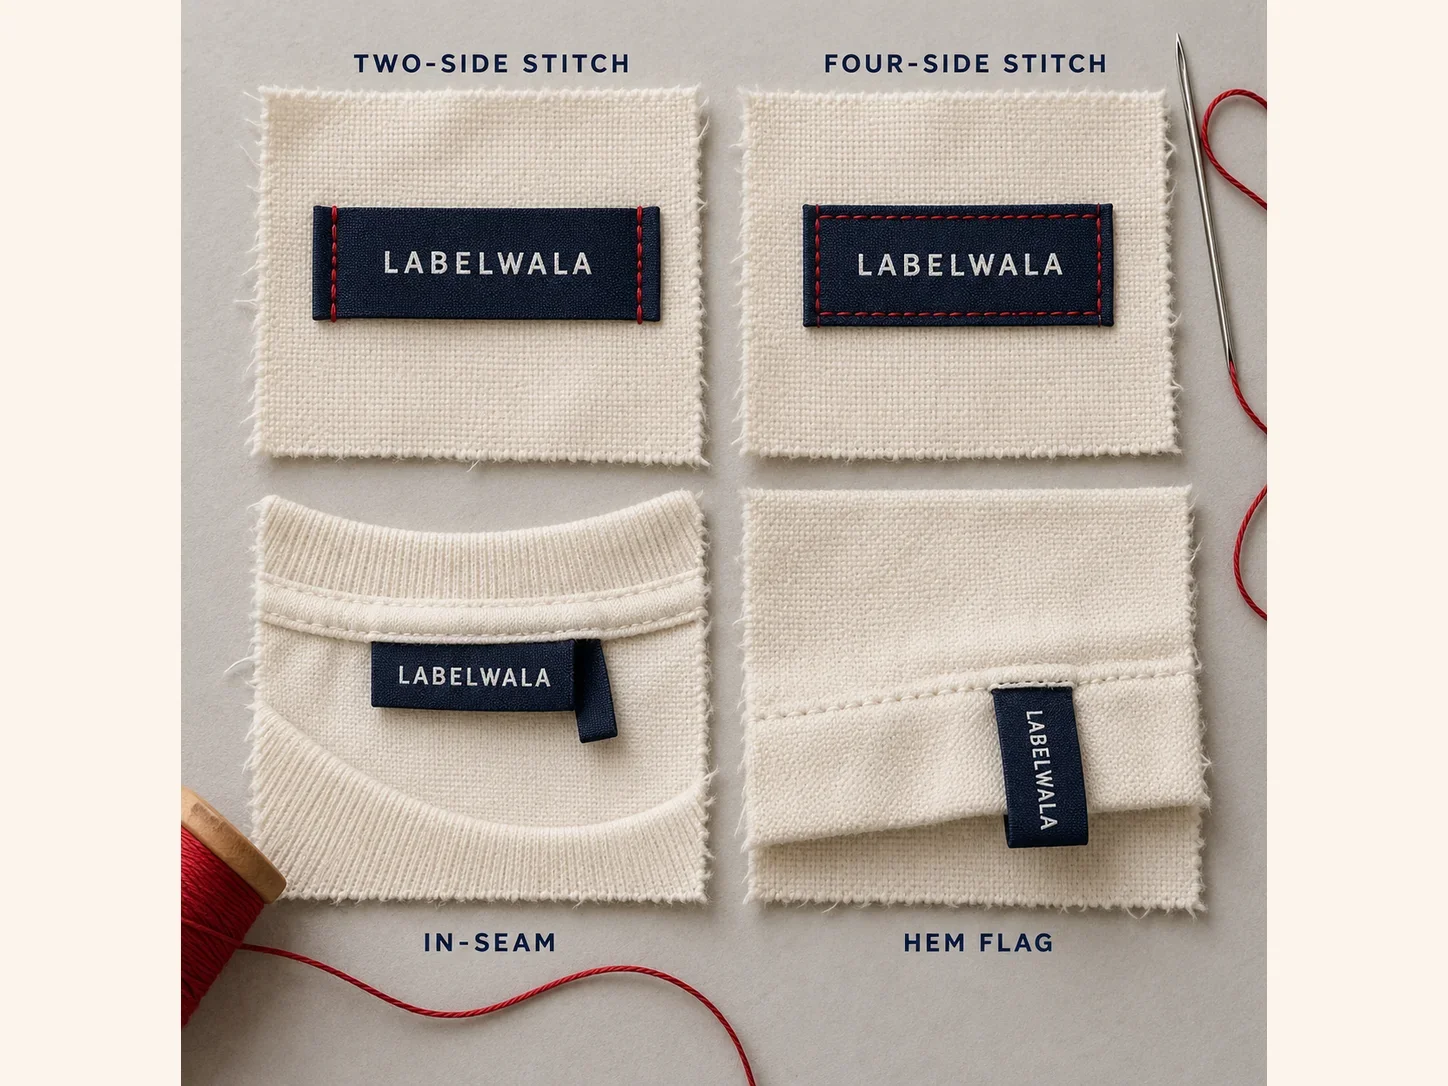
A label is attached in one of four ways: stitched on two sides (end fold), stitched on all four sides (flat or heat-cut labels), caught inside a seam (centre fold, mitre fold) or looped into a seam (loop fold, hem flags). Use a lockstitch with a fine needle and thread matched to the label, keep the stitch 1 to 2 mm inside the folded edge, and give the factory a placement sketch with measurements from fixed seams.
We make labels; we do not sew them in. That happens at your garment factory, your tailor or, for a small brand relabelling stock, your kitchen table. Yet most of the complaints we hear about labels are really about attachment: a label that puckers, sits crooked, lifts at one end or scratches because a cut edge is facing the skin. None of those are label faults, and all of them are avoidable if the person ordering the label and the person sewing it agree on how it will go in.
This guide is the bridge between the two. It explains the four ways a label attaches, which fold suits which method, the stitch, needle and thread that produce a clean result, where each label sits on common garments, and the one-page labelling spec that stops a factory guessing. It applies to woven and printed labels alike; patches and heat transfers follow different rules and have their own guides.
The fold decides the attachment
Every label fold exists because of how the label will be sewn. Choose the fold and you have chosen the attachment method, which is why we ask about the sewing position before anything else at quote stage.
| Fold | Attachment | Where the stitches are | Typical use |
|---|---|---|---|
| End fold | Two-side stitch | Across each folded end, 1 to 2 mm inside the fold | Neck labels on tees, shirts, hoodies; relabelling finished stock |
| No fold (straight or heat cut) | Four-side stitch | Around all four edges | Flat labels on linings, bags, patches, care labels sewn flat |
| Centre fold | In-seam | Raw ends caught in the neck or side seam, label hangs free | Neck labels on knits, size tabs, care labels |
| Mitre fold | In-seam | Both ends folded at 45 degrees and caught in the seam | Loop-style neck labels on shirts and jackets |
| Loop fold | In-seam loop | Both ends together in one seam so a loop stands out | Hem flags, side-seam size tabs, hanger loops |
| Book fold / manhattan fold | Top-edge stitch | Folded over the seam or edge and stitched through the top | Collar and waistband labels, multi-page care labels |
The split that matters most is surface versus seam. End-fold and no-fold labels are stitched onto a surface, so they can be attached at any stage, including onto a finished garment. Centre, mitre and loop folds go inside a seam, so they have to be in position before that seam is sewn. If you are not sure which situation you are in, our fold types guide walks through each one with diagrams.
Two-side stitching: the end-fold neck label
This is the most common attachment in the world and the most forgiving. The label's two short ends are folded under during finishing, so the operator sees a flat rectangle with two clean folded edges left and right. A straight stitch runs down each of those edges.
- Stitch position: 1 to 2 mm inside the folded edge. Closer and the stitch can slip off the fold when the garment stretches; further and the free flap curls.
- Stitch length: 10 to 12 stitches per 25 mm. Longer stitches are faster but the label can rotate between them.
- Top and bottom edges: left free. This is what lets the label move with a stretchy neck instead of fighting it.
- Back-tack: two or three stitches back at the start and end of each line so the thread does not unravel.
Because only the ends are fixed, an end-fold label tolerates stretch, which is why it is the right choice for T-shirt and hoodie necks. It also tolerates a slightly off-square placement better than a four-side stitch, because there is no bottom stitch line to show the error. Our end-fold label guide covers the fold allowance and how the finished size relates to the cut size.
Four-side stitching: flat labels
A flat label with no folds is stitched around all four edges. It gives the flattest, most "sewn-on" look and is the standard for labels on linings, bag interiors, flat care labels and anywhere the label will be handled or pulled.
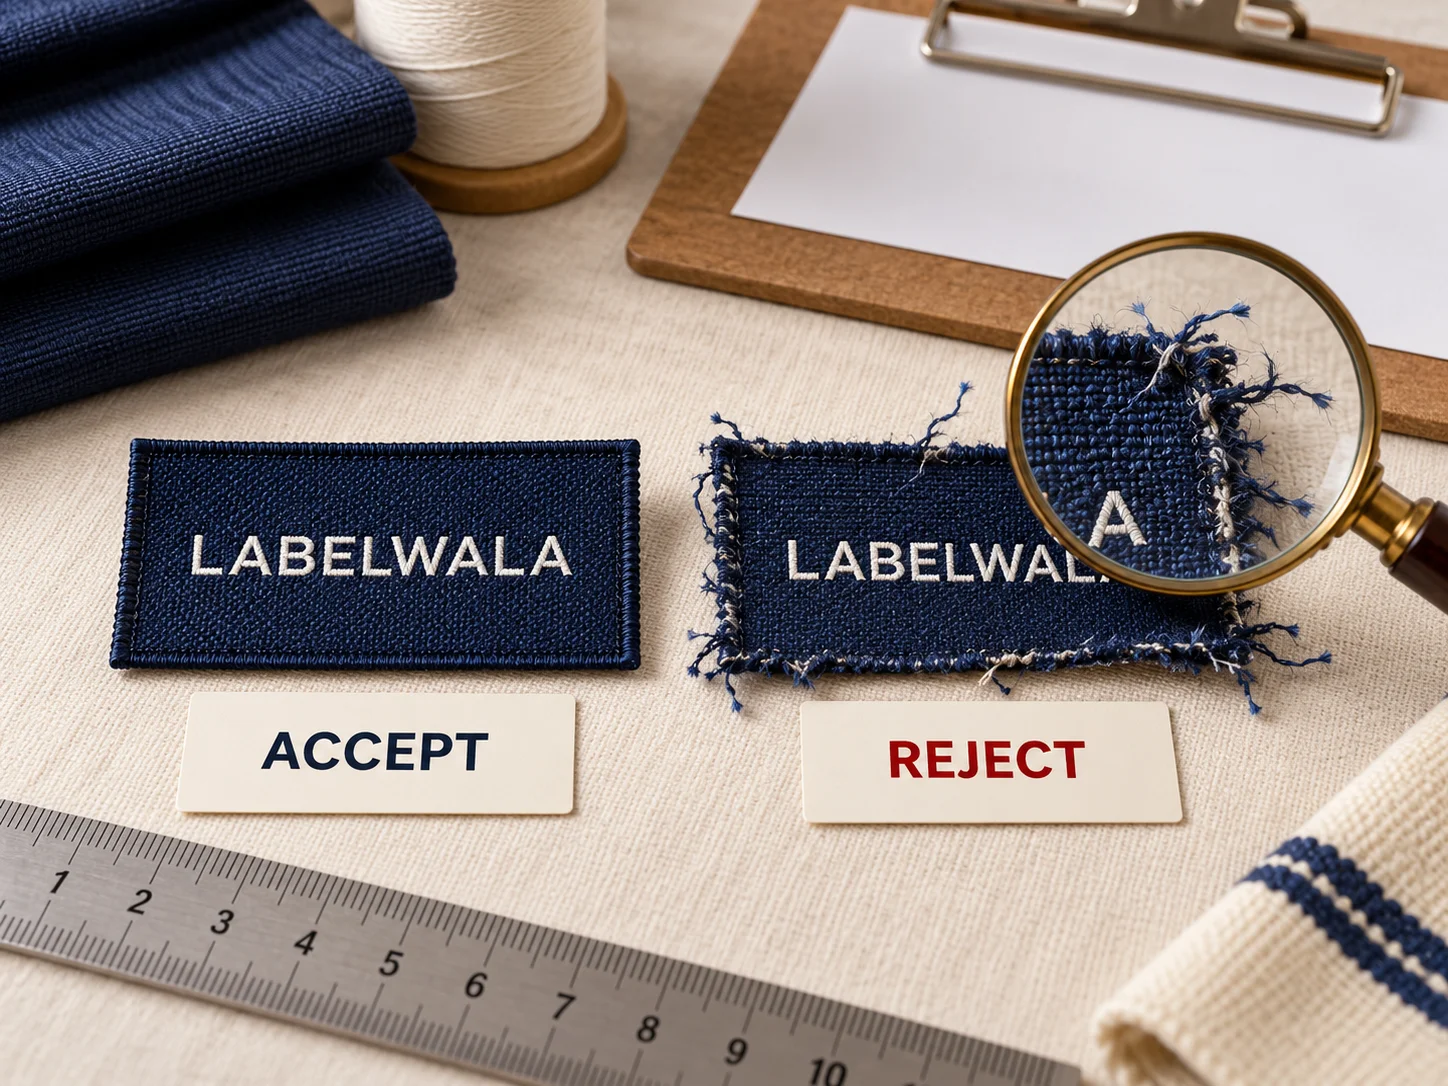
- The edge must be clean. A four-side stitch exposes all four edges, so the label needs a heat-cut, ultrasonic or laser edge that does not fray. A loom-cut edge will fluff within a few washes. See woven label edge finishes.
- Stitch 1.5 to 2 mm inside the edge, turning the corners with the needle down so they are square.
- Not for stretchy fabric. The label does not stretch and the rib does. On a knit neck a four-side stitch puckers the fabric around the label the first time the neck goes over a head. Use end fold there instead.
- Not for a label touching skin at a cut edge. Even a heat-cut edge is slightly stiff; on a neck it is better folded under.
Four-side stitching is also what you use to relabel finished stock with a heat-cut label, and it is how most woven patches are attached when they are not heat-sealed. For patches, a merrow (overlocked) border is usually sewn through rather than stitched beside; our patch guide explains the difference.
In-seam attachment: centre fold and mitre fold
A centre-fold label is folded in half and both raw ends are placed inside a seam before the seam is sewn. The seam stitch holds it; nothing is stitched through the visible face of the label. The result is a label that hangs free from the seam, with a clean fold at the bottom and no visible attachment stitches.
At the neck of a knitted garment this is done while the back-neck seam or the rib is attached: the folded label is laid at centre back with its raw ends up into the seam allowance, and the overlock or the rib-attaching stitch catches it. Size tabs and care labels go into side seams the same way.
- Seam allowance: the label needs 6 to 8 mm of its length inside the seam to be secure. Order the flat length to allow for this, not just the visible height.
- Orientation: the operator has to put the label in the right way up and the right way round. A tiny mark on the back or a note in the spec ("logo faces the wearer's back") avoids a batch of upside-down labels.
- Edge on skin: because the only free edge is a fold, in-seam labels are the softest option for neck wear and the standard for kidswear and innerwear.
- Cannot be added later. If the seam is closed, the label cannot go in without opening it.
A mitre fold is the same idea with both ends folded at 45 degrees so the label forms a point-down loop below the seam; it is common on shirts and jackets where a hanging loop is wanted. Our centre-fold guide covers sizes and the fold allowance.
Loop attachment: hem flags, side tabs and hanger loops
A loop-fold label is folded so that both ends are together, and the two ends go into a seam side by side. The loop stands out of the seam, which is what makes it visible: a hem flag on a hoodie, a woven size tab in a side seam, a hanger loop at the back neck.
- Placement is set by the seam, not the operator. The label goes where the seam is. Height along the seam is what you specify: "hem flag 20 mm above finished hem on the left side seam".
- Reinforce if it will be pulled. Hanger loops carry the garment's weight. A short bar tack across the base of the loop where it leaves the seam stops it tearing out.
- Both faces show. Design the back face of the loop as well as the front, or specify a plain back.
- Trim after sewing. The ends inside the seam are trimmed with the seam allowance. If the label is caught at an angle, the loop will twist; the spec should say "label perpendicular to the seam".
Hem flags are a streetwear staple and the most common loop attachment we supply; the streetwear labels guide covers sizing and placement in detail.
Stitch, needle and thread
A label is small and sits where the eye lands. The sewing details that are invisible on a side seam are visible here.
| Element | Specification | Why |
|---|---|---|
| Stitch type | Lockstitch (ISO 301), single needle | Flat, secure, looks the same on both sides; overlock only where the label is inside an overlocked seam |
| Stitch density | 10 to 12 per 25 mm | Holds the label square without perforating the edge |
| Needle | Size 70 or 80 ballpoint for knits; 80 or 90 sharp for wovens and denim | A ballpoint slides between knit loops instead of cutting them; a fine needle leaves no visible holes in satin |
| Thread | Polyester core-spun, Tex 24 to 27 (roughly size 120 to 100) | Fine enough to sink into the label, strong enough to survive washing |
| Thread colour | Match the label ground | The stitch disappears into the label; matching the garment makes the stitch a line across the label |
| Tension | Balanced, slightly loose on knits | Tight tension gathers the fabric under the label |
| Presser foot | Reduced pressure, or a walking foot on heavy fleece | Stops the top layer creeping and the label skewing |
Two details worth stating explicitly in the spec: back-tacks at every start and finish, and no stretching of the fabric while sewing. Operators on piece rates pull fabric through to go faster; on a rib neck that produces a label that lies flat on the machine and ripples on the body.
Where each label goes
Placement is specified as a distance from a fixed seam, never as "centred" or "near the hem". The table gives the conventions most Indian factories follow; adjust to your garment, but write the number down.
| Label | Position | Measurement |
|---|---|---|
| Neck label, tee or hoodie | Centre back, below the rib or neck tape | Top edge 5 to 10 mm below the neck seam; centred between shoulder seams |
| Neck label, shirt | Centre back, inside the yoke below the collar stand | Top edge 10 mm below the collar stand seam |
| Size tab | Directly below or beside the neck label | 3 to 5 mm gap from the neck label; loop fold into the neck seam on knits |
| Care label, tops | Left side seam, as worn | 100 to 150 mm up from the finished hem |
| Care label, trousers | Inside waistband or left side seam | Centre back waistband, or 100 mm below the waistband in the side seam |
| Hem flag | Left side seam at the hem, or sleeve cuff seam | 15 to 25 mm above the finished hem |
| Waistband label, denim | Centre back, outside, above the yoke | Centred on the back waistband, 3 to 5 mm from the top edge |
| Sleeve tag | Left sleeve, body panel not the cuff rib | 50 to 80 mm above the cuff seam |
| Kidswear neck label | Side seam or printed, not the neck | Side seam 80 to 100 mm up from the hem to keep the neck label-free |
Centre the neck label by measuring from the shoulder seams rather than by eye. A label 5 mm off centre is obvious in a listing photo. On very wide necks, factories mark centre back with a notch at cutting, and the label spec should say "align to the CB notch".
For sizes, our label size guide gives dimensions for every position, and the woven label size chart covers neck, hem and side-seam sizes in millimetres.
Order of operations
Labels are attached at different points in the sewing sequence, and getting a label to the factory after its point has passed means it cannot go in.
- Before side seams are closed: loop-fold care labels, side-seam size tabs, hem flags. These are placed as the side seam is overlocked.
- At neck assembly: centre-fold neck labels and size tabs, caught in the rib or back-neck tape seam.
- After the neck is finished: end-fold neck labels, stitched on two sides onto the finished neck.
- At finishing, after a garment wash: any surface-stitched label that must not go through the wash, and heat transfers.
Ask the factory for their sequence and plan the label delivery around the earliest point. Our lead times guide helps you work backwards from the cutting date.
The one-page labelling spec
Every factory asks for this, and every brand that does not have one gets a different result on every batch. Keep it to one page per garment style.
- A sketch of the garment, back view and inside view, with each label drawn in position.
- For each label: the label name and reference, its finished size, its fold.
- Attachment: two-side, four-side, in-seam or loop, and which seam.
- Measurements from fixed seams, in millimetres.
- Orientation: which way the logo faces, which face shows on a loop.
- Stitch: lockstitch, density, thread colour, needle size for the fabric.
- Sequence: which labels go in before which seam.
- Tolerance: usually plus or minus 3 mm on position, zero on orientation.
- Quantity supplied per label and the wastage allowed.
Attach a photo of an approved sewn sample once you have one. A photo settles arguments faster than any drawing.
The designer exports a spec sheet for every label. Fold, finished and cut size, material and colours come out as a one-page PDF you can attach to your labelling spec, so the factory and the label maker are reading the same numbers.
Sewing labels at home or in a small unit
If you are a small brand attaching labels yourself, the same rules apply with a domestic or a single-needle industrial machine.
- Pin or glue-baste the label with a dab of washable fabric glue stick, then sew. Pins distort small labels; a glue baste holds them flat.
- Use a size 70 or 80 ballpoint needle on knits and a fine polyester thread in the label colour.
- Straight stitch, length 2 to 2.5 mm, and sew slowly along the fold with the needle 1 to 2 mm in.
- Do not stretch the neck. Let the feed dogs move the fabric.
- Back-tack at each end and trim the threads close.
- Press the finished neck from the inside with a cloth over the label; it settles the stitches.
Hand sewing works for a handful of pieces: a small slip stitch along each folded end, through the label fold and a few threads of the garment. It will not survive the wash as long as a machine stitch, so it is for samples and photography rather than stock.
Getting labels made at Labelwala, ready for the sewing line
We make woven and printed labels in Ahmedabad, Gujarat, and we have been doing it for 25 years. We do not attach labels to garments, but we cut and fold every label for the attachment you tell us about, so it arrives at the factory ready to sew.
- Minimum order: 1,000 pieces per design.
- Quotes: we usually reply within 2 hours on a working day.
- Production: 7-10 days once artwork is approved. Rush jobs run 3-5 days.
- Folds: end fold, centre fold, mitre fold, loop fold, book fold and straight cut, with heat-cut, ultrasonic or laser edges where the label is stitched on four sides.
- Delivery: across India, directly to your factory if you prefer, and worldwide for export.
Tell us where the label will be sewn and whether the garment is already made. Those two answers decide the fold, and the fold decides whether the label can be attached at all. If you send a photo of the position on a sample garment, we will suggest the construction and the finished size together.
We are rated 5.0 on Google from 27 reviews.
Common mistakes
- Four-side stitching a label onto a stretchy rib neck.
- Ordering centre-fold labels for garments that are already sewn.
- Thread matched to the garment instead of the label.
- Stitching 4 or 5 mm inside the fold, so the ends curl.
- No orientation note, so a batch goes in upside down.
- "Centred" in the spec with no measurement from the shoulder seams.
- Hem flags delivered after the side seams are closed.
- A loom-cut edge exposed on a four-side stitched label.
- Stretching the fabric under the foot on piece-rate lines.
- No approved sewn sample before the bulk run.
Sewn-sample checklist
- Is the label centred, measured from both shoulder seams?
- Is the top edge the specified distance below the neck seam?
- Does the label lie flat when the neck is stretched and released?
- Are the stitch lines 1 to 2 mm inside the folds, straight and back-tacked?
- Is the thread colour invisible against the label?
- Is the logo the right way up and facing the right way?
- On loop labels, is the loop perpendicular to the seam and the back face acceptable?
- Is any cut edge away from the skin?
- Are the care label and size tab in the agreed seam at the agreed height?
- Has one sample been through a wash without the label puckering or lifting?
What we would recommend
For most garments: an end-fold neck label stitched on two sides, with lockstitch at 10 to 12 per 25 mm, a fine ballpoint needle and thread matched to the label; a loop-fold care label in the left side seam placed before the seam is closed; and a one-page labelling spec with measurements from fixed seams and an approved sewn sample photo. Reserve four-side stitching for flat, heat-cut labels on stable fabric, and in-seam centre folds for knits where the softest possible neck matters.
Decide the attachment when you decide the label. Order the fold that matches, get the labels to the factory before the seams close, and the label you approved is the label your customer sees.