In brief
Every satin label has two colour decisions: the pre-dyed base ribbon and the ink printed on it, and because inks are translucent the base tints everything above it. Start from white ribbon for multi-colour or Pantone-critical artwork, treat white as a demanding opaque ink on dark satin, and approve colour from a strike-off on the actual ribbon in daylight.
Most colour conversations about satin labels start and end with the ink. The brand sends two Pantone codes, the supplier prints them, and the sample comes back looking almost right but not quite: a little warm, a little dull, a little grey where it should be white.
Nearly always, the ink wasn't the problem. There are two colour decisions in every satin label, and the one underneath gets made by default.
Decision one: which base ribbon should you use?
Your label starts as pre-dyed satin ribbon. That base colour isn't a background. It's the surface every ink on top has to fight with, because printing inks are translucent. Whatever is underneath comes through.
The practical rule: if your logo is multi-coloured or has to match brand colours precisely, start from white ribbon. If you want a coloured or black base and accurate colours on top, budget for a white under-base to be printed first, otherwise every shade lands darker and duller than your file.
Try colourways before you commit. The free label designer previews your artwork on satin, damask, taffeta and cotton with the material's own sheen and weave.
Decision two: how many inks do you actually need?
How much extra colours cost depends entirely on the press: which is why this question can't be answered without knowing the printing method.
- Unlimited colours at the same price
- Gradients and photographic artwork included
- No screen charges, so low minimums
- Colour built from CMYK, so saturated shades can drift
- One engraved screen per colour, each with a setup charge
- Three or four colours is the practical ceiling
- No gradients: each screen prints a solid
- But: mixed spot inks hit Pantone far more accurately
So "how many colours can I have?" really means "which press am I on?". That trade-off is unpacked in satin label printing methods.
Why is white the hardest colour to print on satin?
Designers treat white as the absence of ink. On a black satin label it's the opposite. It's the most demanding ink on the job, because it has to be opaque enough to hide a dark ribbon completely.
Where coverage falls short, white doesn't look like weak white. It looks grey, and it shows up first in exactly the places you care about: thin strokes, small text, fine logo detail.
Three white-ink rules. Go a weight bolder than you would on white ribbon. Delete hairline white rules entirely. And never approve white coverage from a screen proof: a monitor emits light, ink only reflects it, so white always looks stronger on screen than it will on cloth.
Why does Pantone shift on polyester satin?
Pantone references are defined on paper. Paper is matte, flat and absorbent. Polyester satin is smooth, slightly glossy and reflective: light bounces off it differently, so the same ink reads differently.
That isn't a supplier failing. It's substrate physics, and it applies to every printer in the world. What a good supplier can do is mix spot inks on a screen press to land visually very close, and show you the result on the actual ribbon.
The correct process: send the Pantone code as your target, ask for a strike-off on your actual base ribbon, then approve or adjust from that physical sample in daylight. Never sign off colour from a monitor, and never hold a paper Pantone chip against a screen. The woven-side equivalent is covered in Pantone to thread.
Metallics: metallic ink or actual foil?
Gold and silver are where files and reality diverge most. A "metallic gold" in your artwork is just a yellow-brown; it has no shine because a flat ink can't reflect like metal.
- Metallic ink carries fine reflective particles. It reads a little richer than flat ink and costs modestly more: a reasonable middle ground.
- Foil stamping presses actual metallic film onto the satin. It's genuinely reflective, unmistakably premium, and adds a die charge plus a production pass.
If gold is central to your brand mark, foil is the honest answer. If it's decorative, metallic ink usually satisfies.
How do you keep batch three matching batch one?
Colour drift between reorders is the complaint that arrives six months late, when a new batch of labels is sewn next to old stock and the difference is suddenly obvious.
Two things move. Dyed ribbon comes in dye lots that vary slightly, and ink mixes are remade for each run. Neither drifts much on its own; together, across three or four reorders, they can add up to a visible shift.
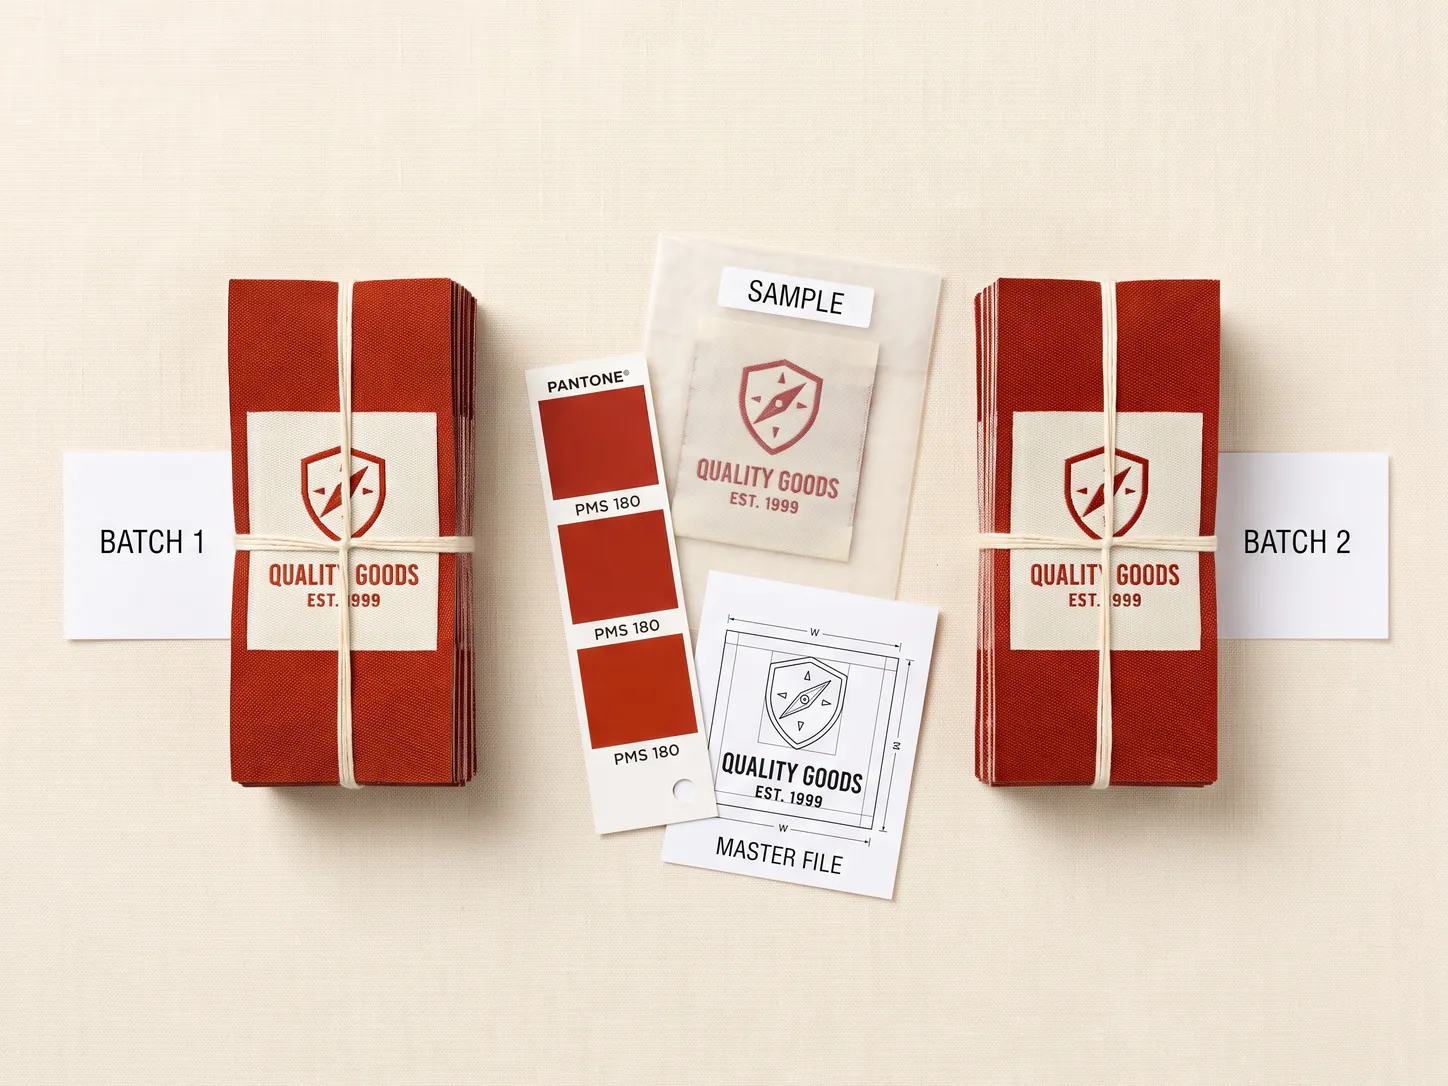
Keep an approved physical sample from run one, and require every reorder to be matched against that sample, not against the artwork file.
Stay with one supplier and one base ribbon spec, and order larger quantities less often. Fewer runs, fewer chances to drift.
The full reorder discipline is in reorders and reprints.
Colour approval on a screen is a guess. Colour approval on the actual ribbon, in daylight, next to the actual garment. That's a decision.
Where large solid colours go wrong
One practical trap worth knowing about before you commit to a design: big flat areas of a single colour are the hardest thing to print evenly on satin.
A large solid block shows every small variation in ink laydown as banding or mottling, and the sheen of satin makes it more visible rather than less, because a reflective surface exaggerates unevenness. The same ink in small shapes and type looks perfect.
The usual fix is to let the base ribbon do the work instead. Choosing a coloured ribbon and printing only the light elements gives you a flawless solid ground, because it was dyed rather than printed, and it is normally cheaper too since there is far less ink on the label.
Keeping colour the same on the next order
Colour drift between batches is the complaint that arrives a year later, when two seasons hang side by side and no longer match.
On printed satin the mechanism is specific: the ink is mixed to a recipe, and the ribbon it lands on has its own slight variation in whiteness and absorbency between rolls. Reproduce the recipe on a marginally different base and you get a marginally different result. Nothing has gone wrong; nothing was fixed.
- Record the ink recipe and the base ribbon reference, not just the Pantone. The Pantone communicates the target; those two reproduce it.
- Keep the approved physical sample. It carries colour, base and finish together, which no code does.
- Judge every batch against that original, never against the previous batch, which lets drift accumulate a step at a time.
- Order the full run together where you can, so every piece comes from one ink mix and one roll.
- Store them out of sunlight. A stack near a window fades unevenly across the pile.
Choosing the base ribbon deliberately
Because the base tints everything above it, picking it is a design decision rather than a default. A short version of what each does:
- White gives the truest rendition of your inks and the widest usable range. It is the right default for multi-colour artwork and the only base on which a white element can exist at all.
- Cream or natural warms every ink slightly. It suits organic, heritage and muted palettes, and it quietly kills cool blues and greys.
- Black or a dark base means every printed colour has to be darker than the ribbon, so the design usually has to work in reverse, with light elements coming from the base rather than from ink.
- A coloured base matched to the brand can look excellent with a single contrasting ink, and it removes the need to print a large solid area, which is where banding shows.
The practical shortcut: if the artwork is multi-colour or contains anything white, start from a white base. If it is one or two colours and you want the label to feel considered, a coloured base with a single ink is usually the better-looking and cheaper answer.
Translucent ink is the whole problem
The reason the base ribbon matters so much is that printing inks are translucent. They tint what is underneath rather than covering it, so the ribbon is not a background, it is a filter every colour has to pass through.
That explains the two complaints that come up most often. A colour that reads warm was probably printed on a cream base, which pushes every ink towards yellow. A colour that reads dull was probably printed on a base darker or greyer than white, which lowers the contrast of everything on top.
It also explains the hard limit. Sublimation has no white dye, because white is the absence of colour, so anything white in the artwork is simply the ribbon showing through. On a white base that is fine. On a coloured base a white logo is not a sublimation job at all, and the answer is a screen print with an opaque white, a design reversed out of the base colour, or a woven label.
Flag that at quote stage. It is the single most common reason a satin label has to be requoted after the artwork arrives.
Contrast beats palette
A satin label is small, often read in poor light inside a garment, and printed with translucent ink. Whether it works is mostly a contrast question, and only secondarily a question of which colours you chose.
- Dark on light is the most forgiving and holds fine detail best.
- Light on dark is harder, because a translucent ink cannot lighten what is beneath it. On a dark base, light elements usually have to come from the base itself.
- Tone-on-tone photographs beautifully and reads badly. Grey on light grey is elegant in a render and invisible in a shop.
- Two close mid-tones lose their boundary entirely at label size.
Test it the way a customer will: hold the sample at arm's length in ordinary room light, against the garment it belongs to. If you have to bring it closer to read it, the contrast is wrong however good it looked on screen.
Common mistakes
- Choosing the ink and letting the base ribbon be picked by default.
- Designing a white logo for a coloured base without checking the print method.
- Approving colour from a screen or a paper swatch instead of printed satin.
- Assuming a Pantone code guarantees an exact result on a translucent system.
- Recording the Pantone but not the supplier's ink recipe.
- Comparing a new batch against the previous one instead of the original sample.
- Judging the sample under a desk lamp rather than in daylight.
Choosing colours with Labelwala
Labelwala has been making woven and printed labels in Ahmedabad, Gujarat, for 25 years.
- Quotes: usually within 2 hours on a working day.
- Production: 7-10 days from artwork approval, or 3-5 days on a rush job.
- Minimum order: 1,000 pieces per design.
Send your Pantone references with the artwork and say which base ribbon you want, or ask us to recommend one. If any part of the design is white on a coloured ground, say so early: it decides the print method.
We are rated 5.0 on Google from 27 reviews.
The short answer
Every satin label has two colour decisions. The base ribbon comes first, because inks are translucent and whatever is underneath shows through: white for true colour, cream to warm things, black or coloured only with a white under-base if brand colours must be accurate. The ink comes second, and how many you can afford depends on the press: unlimited on digital, three or four on screen. White is the hardest ink. Go bolder, skip hairlines, judge it on cloth. Pantone shifts on polyester because satin reflects light differently from paper, so approve a physical strike-off, never a screen. And keep an approved sample so reorder three still matches run one.