In brief
Open Labelwala's free label designer, start from more than 300 ready-made designs, choose the fold first, set the finished size, then pick the material, which sets the minimum letter size at 2.8 mm for woven damask and taffeta or 2.1 mm for printed satin. Add your logo and text, clear the print check warnings, and press Quick Quote.
Most label makers online give you a rectangle. You put a logo in it, download a PNG, and the trouble starts at the factory: the text is too fine for the loom, the tagline sits exactly where the label folds under, the logo is a 300-pixel screenshot, and the "40 mm" label was drawn with no idea that an end-fold label is cut 16 mm wider than it finishes.
We built the Labelwala label designer to close that gap. It is free, it needs no signup, and it draws your label the way we make it: at true millimetre scale, on the real fold, in the real material, with a print check that knows what a thread can and cannot do. This walkthrough goes through it step by step and explains the production reason behind each screen, so you understand what you are choosing rather than just clicking through.
If you already know your fold, size and material, jump straight to the tool. If you do not, the steps below decide them for you in the right order.
Fold first, then everything else
The fold decides the cut size, the safe area and what the label can carry. Choose it before you place a single letter.
Material sets the minimum type size
Woven damask holds 2.8 mm letters; printed satin holds 2.1 mm. The designer changes its rules when you change material.
Fix the badge before you quote
Every warning the print check shows is something we would send back at proof stage. Clearing them saves a day.
Step 1: start from a real label
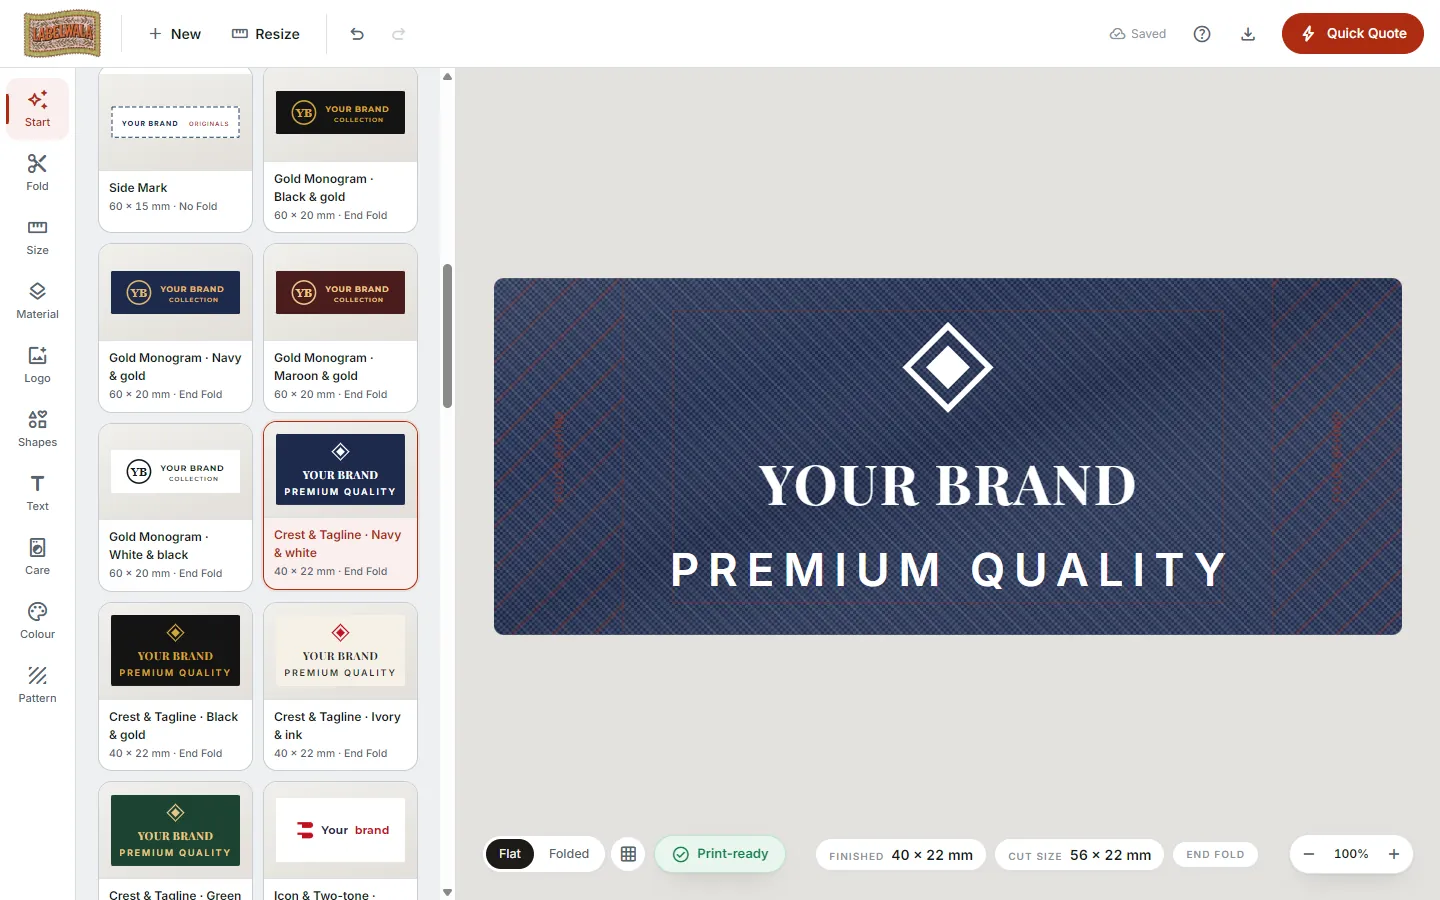
The Start panel holds more than 300 ready-made designs in eight families: brand labels, printed satin, size and number, care, uniform, ethnic, patches, and kids and street. Every one of them is modelled on a label we have actually woven or printed, in the colourways we run most: black and gold, navy and white, cream and copper, pink and red, yellow and black. Pick the family closest to your garment and tap a design. Your choice only sets the starting point; nothing in it is locked.
Designs that had an emblem in the original carry a placeholder mark, a monogram ring, shield, crest or swoosh drawn as a vector. It is there to hold the space. When you upload your own logo in step 5, it drops into exactly that spot at exactly that size, so you see the real composition immediately instead of a logo floating in a corner.
Use the search box if you know what you want ("crest", "hem loop", "declarations") and the category dropdown if you do not. The first time you open the tool, a short tour points at each control; it runs once and is available again under the help button.
Step 2: choose the fold before the design
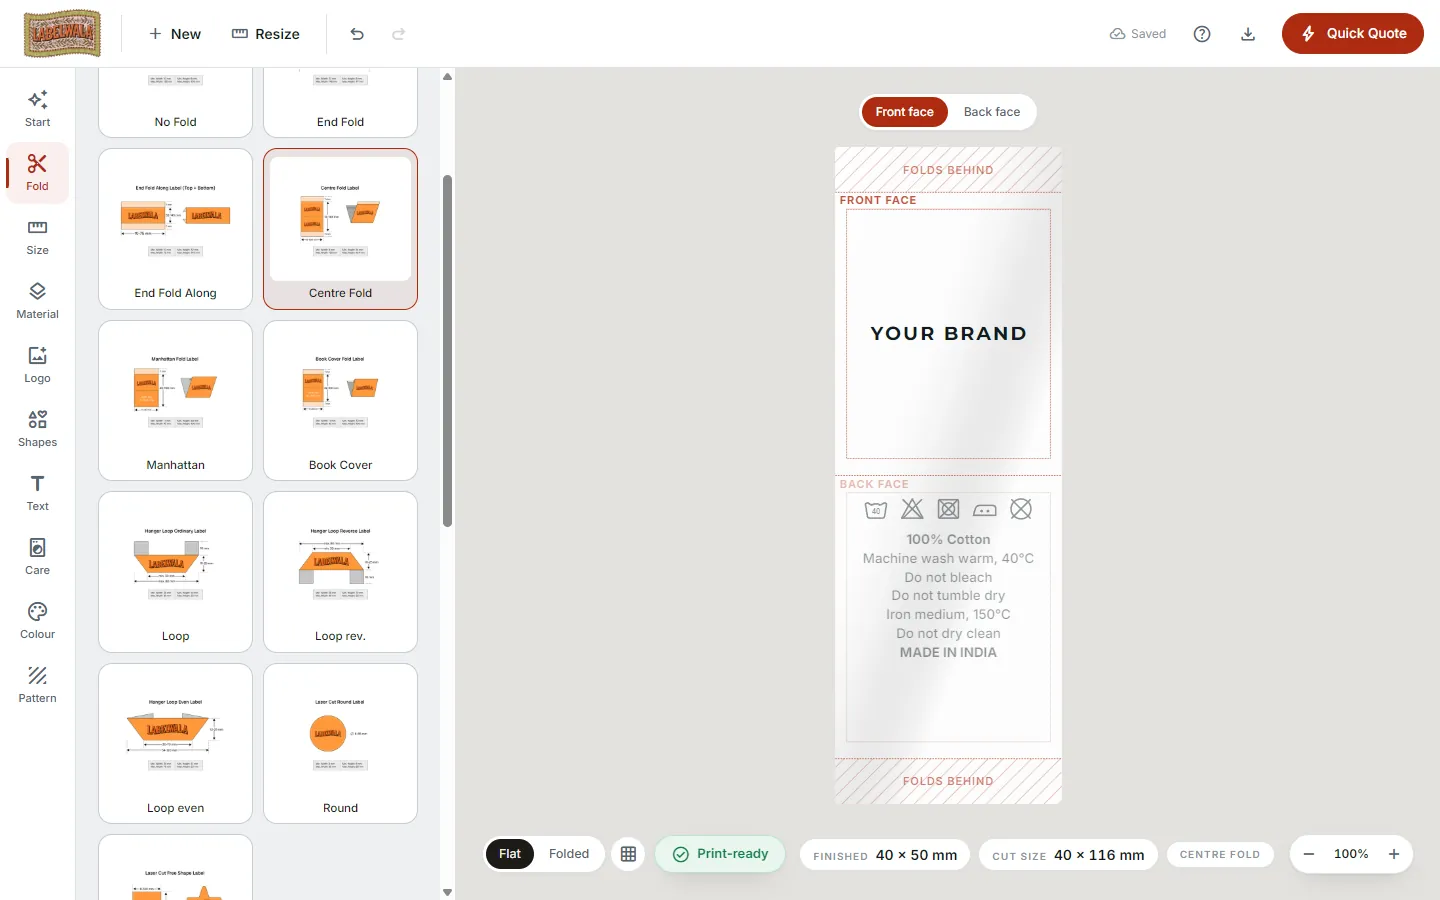
This is the step most tools skip, and it is the one that matters most. The fold is decided by how the garment is sewn, not by how the label looks, and it changes the piece of fabric we actually produce. The designer offers all eleven finishes we make, and the moment you pick one the canvas redraws as the flat piece: the visible face in the middle, and the parts that fold under or go into the seam shown hatched, so you can see where artwork must not go.
| Fold | What the flat piece looks like | Typical use |
|---|---|---|
| No fold (straight cut) | The finished size, cut all round | Patches, badges, labels stitched on four sides |
| End fold, left and right | 8 mm turned under each end; 40 mm finishes from a 56 mm cut | The standard neck label |
| End fold, top and bottom | 8 mm turned under at top and bottom | Tall labels, side seams |
| Centre fold | Two faces, folded in half, both ends turned under | Hem tags, size tabs, brand front with care on the back |
| Manhattan fold | One face with the top turned under | Loop-in-seam labels |
| Book cover fold | Two faces that open like a cover | Care booklets, two-language labels |
| Hanger loops (three types) | A trapezoid face with seam tabs at each side | Coat and jacket hanging loops |
| Laser-cut round and free shape | Cut on the contour of the artwork, 1 to 10 mm out | Badges, emblems, kids' labels |
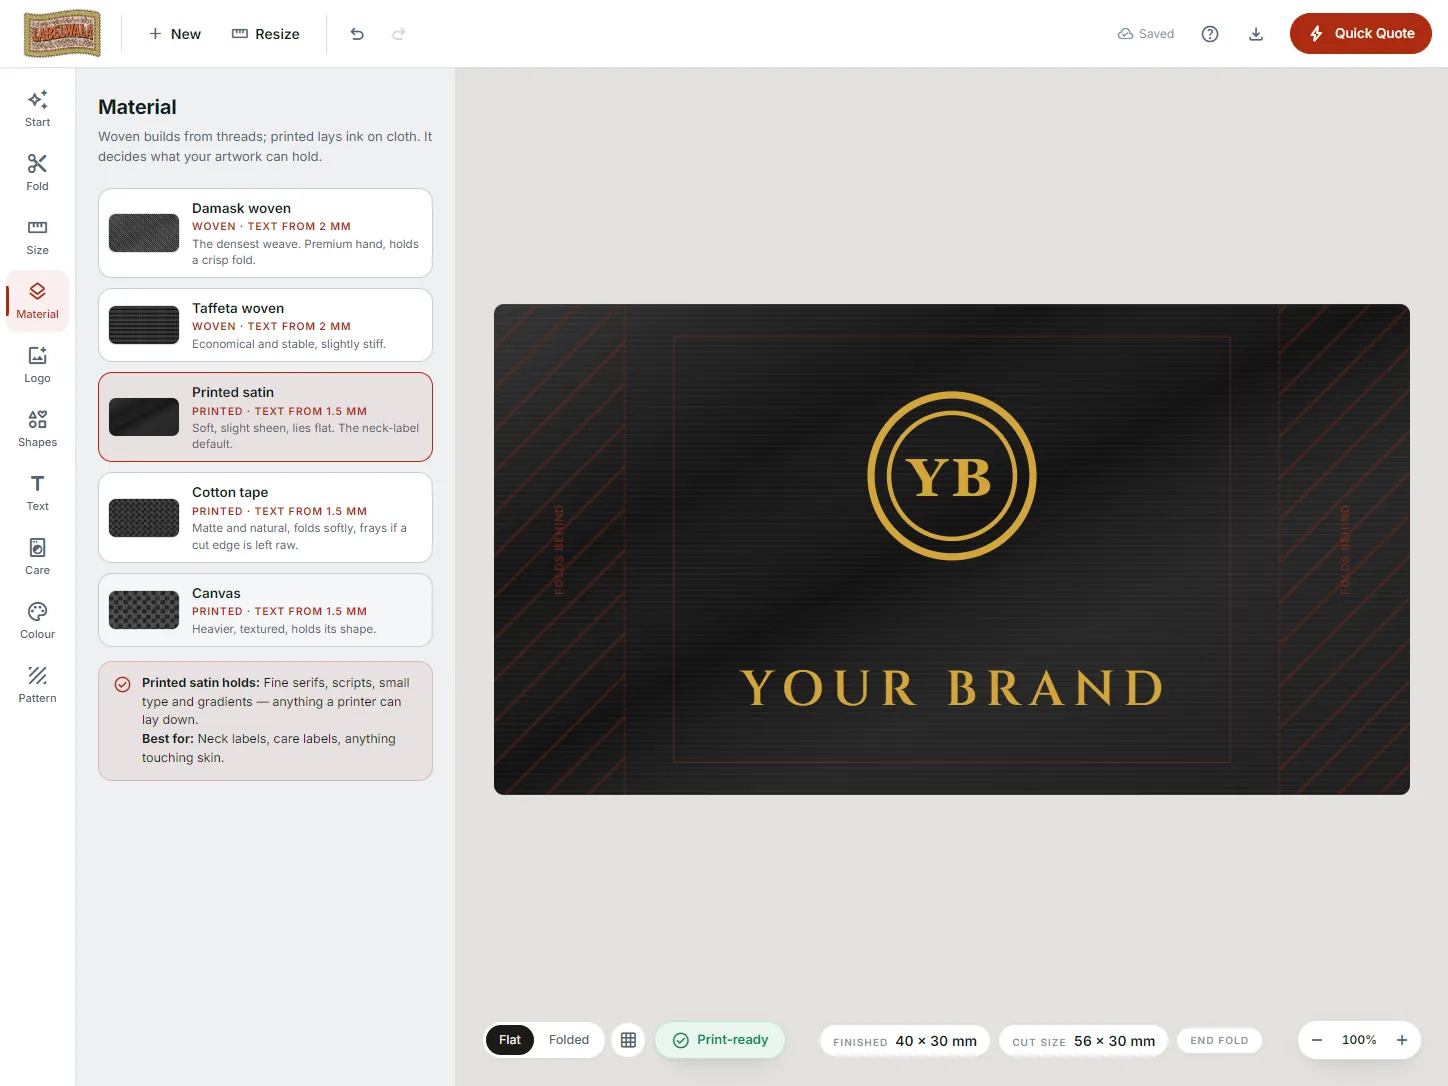
Two things fall out of this automatically. The status bar under the label shows both the finished size you chose and the cut size we will actually make, which is the single most common misunderstanding in label orders. And the size limits for the next step change to what the fold can do: a hanger loop cannot be 8 mm tall, and an end-fold label cannot be 130 mm wide.
Step 3: set the finished size
The Size tab has the presets we quote most, neck label, neck small, neck wide, hem tag, size tab, care label, brand tab, waistband and round patch, plus a width and height box in millimetres. The numbers are real: a 40 × 20 mm label on screen at 100 percent zoom is 40 × 20 mm on your monitor, and the export is at the same scale. If you are unsure, start with the preset for the garment position and adjust after the text is in; the print check will tell you if the label is too small for what it carries.
For a size table by garment type, see our label size guide. The designer enforces the same limits.
Step 4: pick the material, and let the rules change
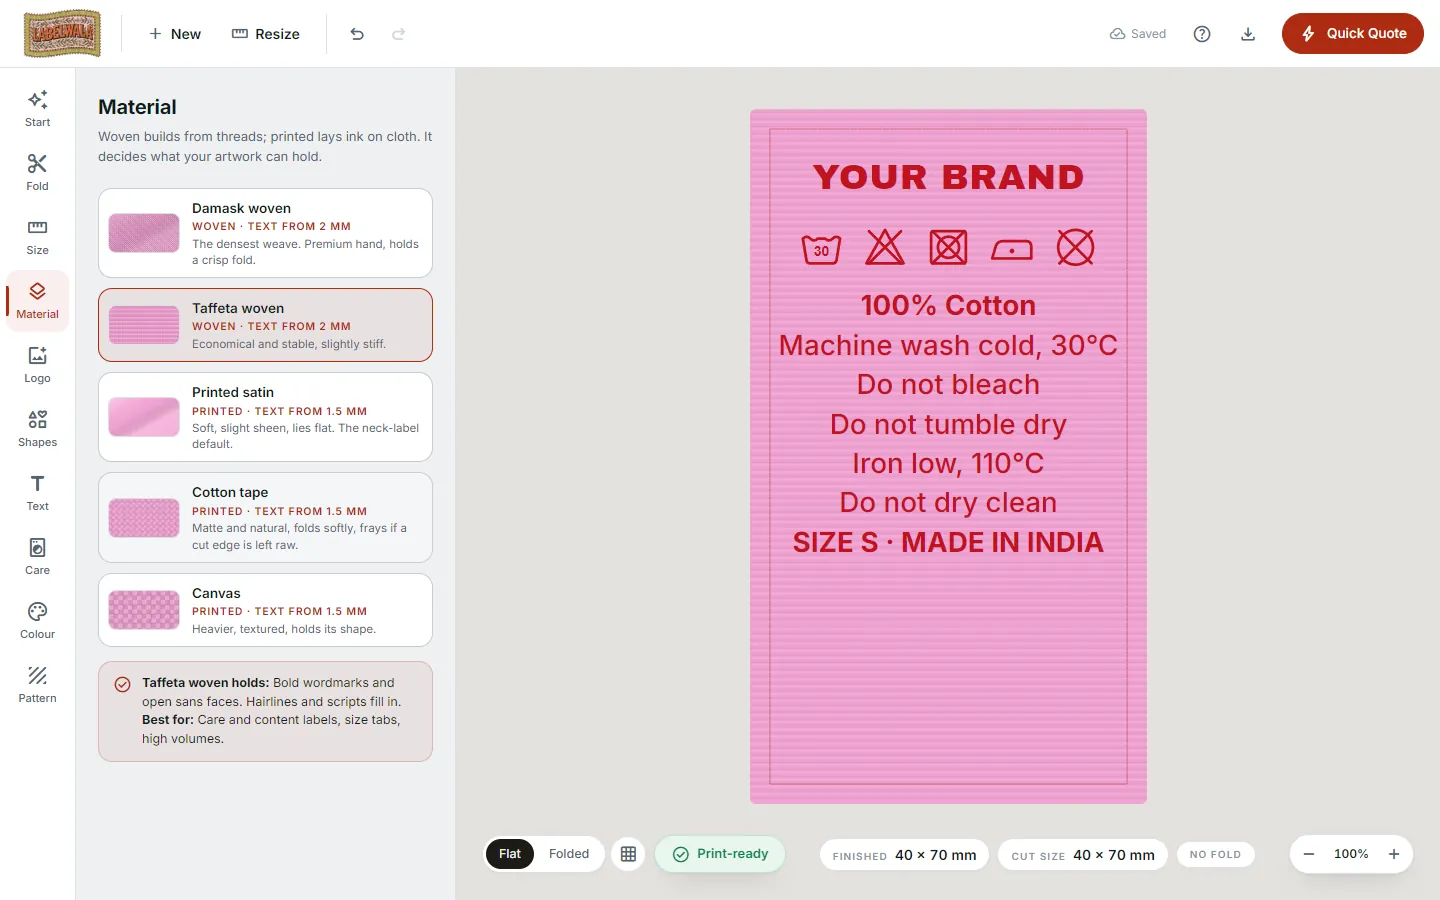
Material is not a look; it is a set of constraints. The Material tab shows woven damask and woven taffeta first, then printed satin, cotton tape and canvas, and it renders the texture on the canvas so a light label on satin reads differently from the same design on damask. Behind the texture, the print check switches its rules.
| Material | Minimum letter size the check allows | What it is good at |
|---|---|---|
| Woven damask | 2.8 mm (about 2.0 mm cap height) | Fine logos, dense weave, soft hand |
| Woven taffeta | 2.8 mm; fine serifs and scripts are flagged | Economy woven, bold simple marks |
| Printed satin | 2.1 mm | Small type, contact details, care labels |
| Cotton tape | 2.1 mm | Natural look, tone-on-tone print |
| Canvas | 2.1 mm | Patches, workwear |
Those thresholds are the sizes at which the counters inside 8, 6, 0 and R still stay open after the first few washes. Below them a woven 8 becomes a 6. If you want to know why, our artwork setup guide goes into thread density; here it is enough that the tool will not let you design something that fails silently.
Step 5: logo, text and shapes
Logo. Upload a PNG, JPG, WebP or SVG, up to 8 MB and up to two images per label. The designer reads the dominant colours out of your logo and builds palettes from them in the Colour tab, so a label in your brand colours is one tap away. It also checks resolution against the printed size: a 320-pixel logo at 18 mm wide is fine; the same file at 40 mm is flagged as soft, with a one-tap fix that shrinks it to a safe size. Raster logos with a white box get a "remove white background" button.
Text. Double-click any text on the label to edit it in place, drag it to move it, pull a corner grip to resize. The toolbar above the canvas gives you the font, size in millimetres, colour, bold, italic, case and alignment. Fonts include English families from Inter and Montserrat to Playfair and Cinzel, and Devanagari and Gujarati families for bilingual and ethnic-wear labels; the material rules apply to all of them, and fine scripts are flagged on taffeta where they would not weave.
Shapes. Sixteen vector shapes, bars, frames, badges, stars and rings, sit behind the text and print in one flat colour, which is what a loom likes. A bar behind a wordmark or a frame around a crest takes seconds.
Keep it to two or three colours on woven. Each colour is a separate thread on the loom. The check warns above five colours on damask and taffeta; simplifying the palette moves the price more than the fold ever will.
Step 6: wash-care labels done properly
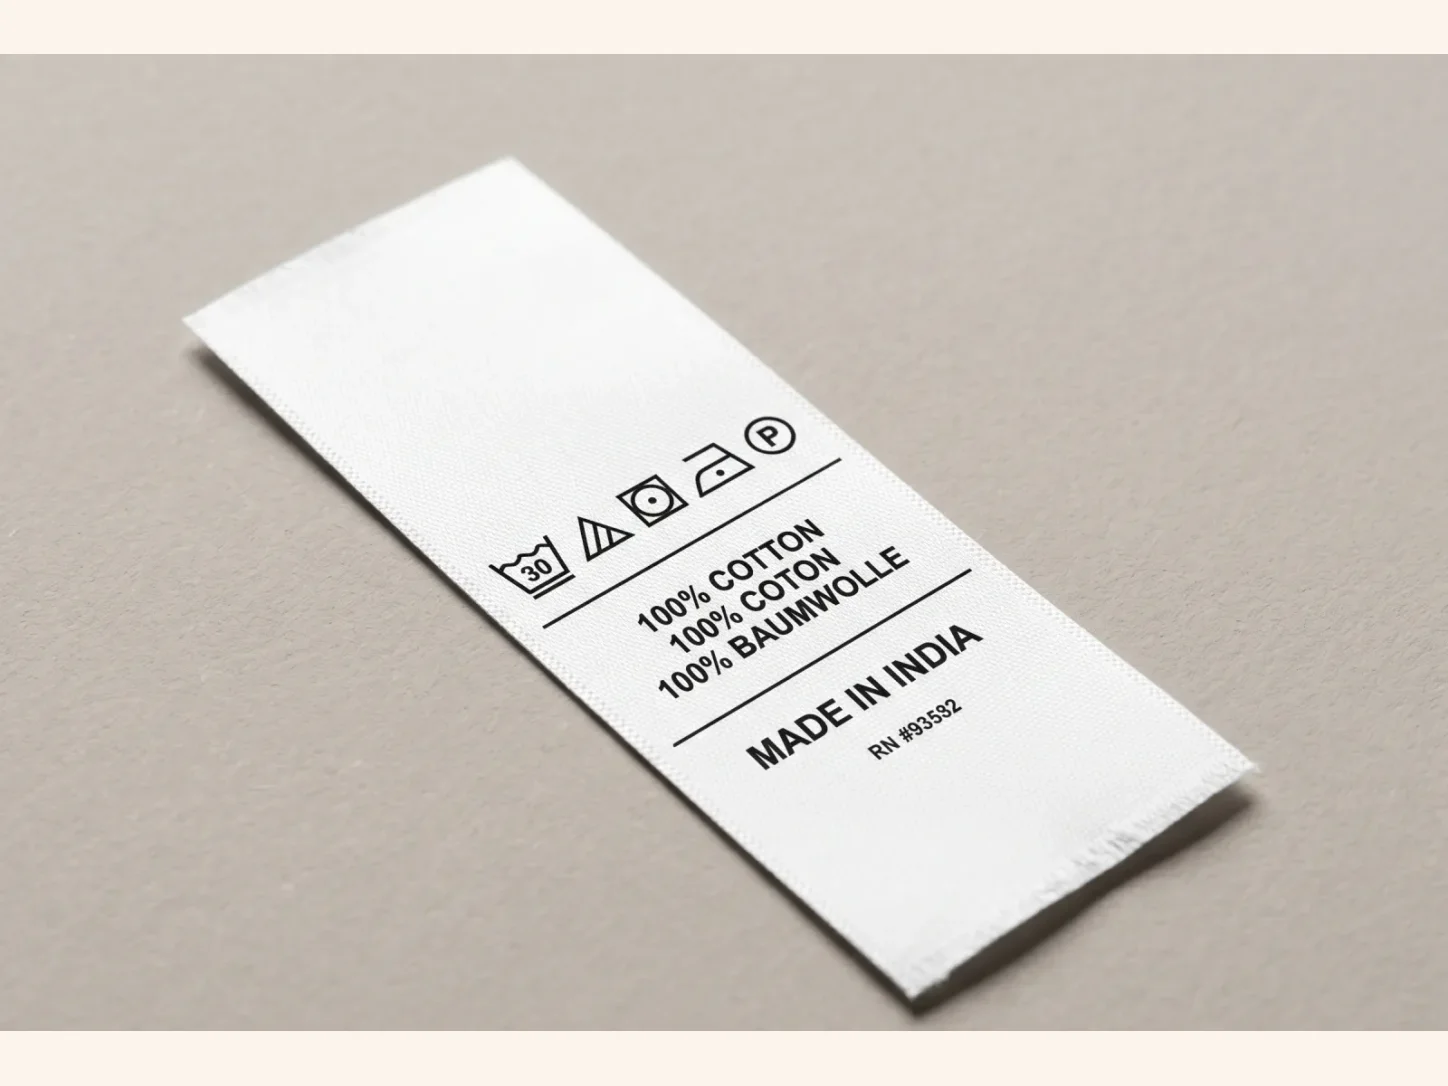
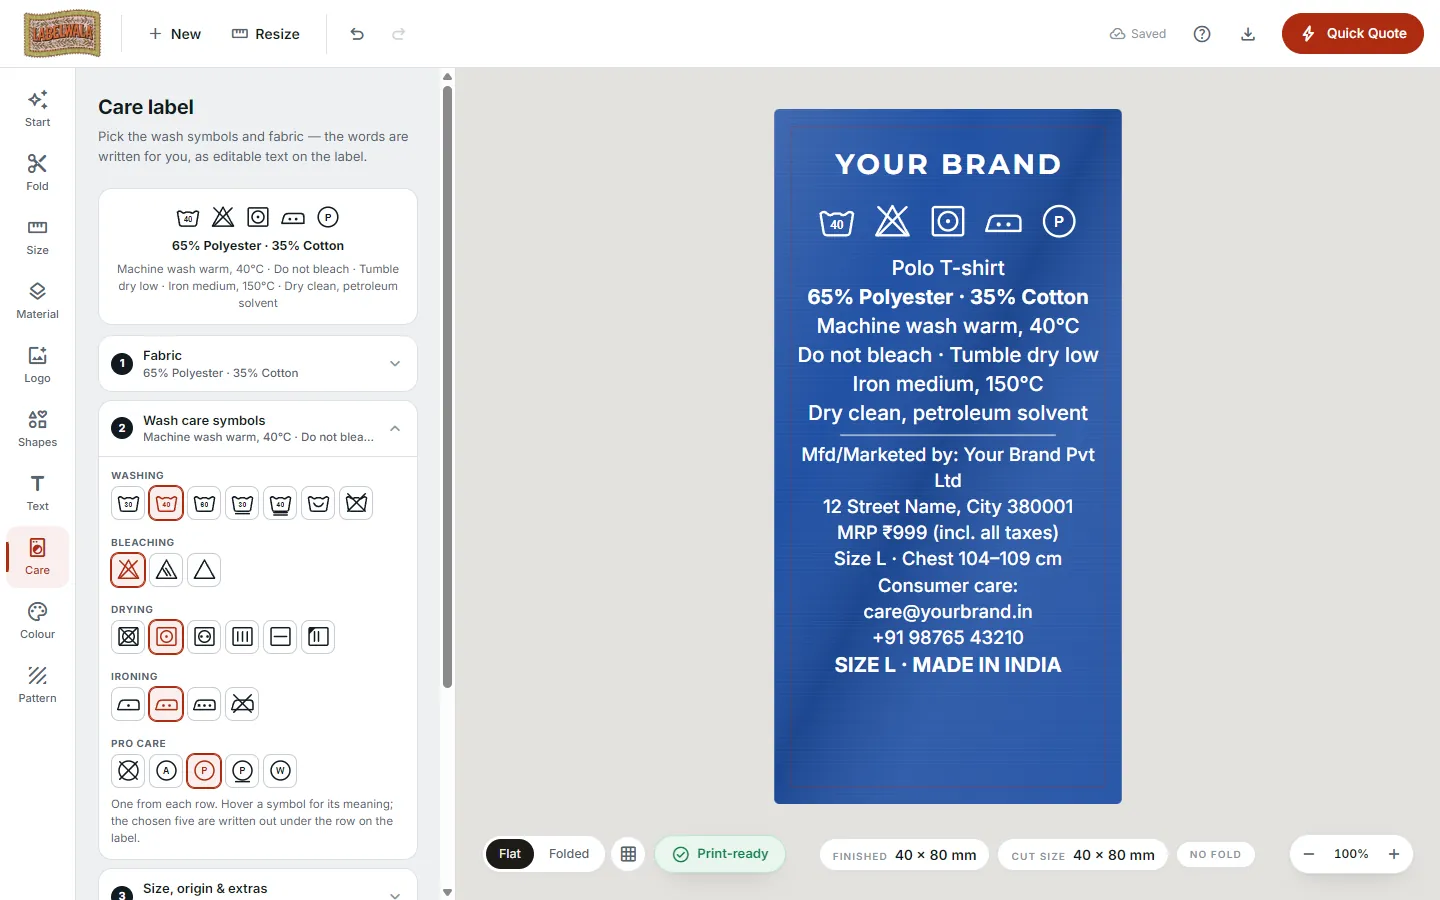
The Care tab is a care-label generator inside the designer. Pick a fibre composition (the tool insists it totals 100 percent), choose one symbol from each of the five GINETEX groups, and the care wording is written for you and laid out on the label with the symbol row above it. Add the size in an international indicator and in centimetres, the country of origin and any extra instruction, and switch on the India declarations block if the garment is sold here: manufacturer or marketer name and address, MRP inclusive of taxes, consumer-care email and phone, and for pre-packaged goods the net quantity and month of manufacture. A checklist counts what is filled in.
Everything the Care tab writes is ordinary text on the label. Move a line, restyle it, reword it; the symbol row drags and resizes like a logo, with a 5 mm floor on woven and 4 mm on printed so the bars and dots inside the symbols survive. Eight ready-made care labels under Start → Care give you the layouts we produce most, from a 30 × 50 mm inner label to a 50 × 90 mm label with full declarations. For the rules themselves, see our care symbols guide.
Step 7: read the print check
The badge under the label reads "Print-ready" when the design passes and lists problems when it does not. Every item is something we would otherwise send back at proof stage, so clearing them saves at least a day. The checks are:
- Text too small for the material, with the exact threshold and a fix that raises it.
- Artwork on a fold line or in the seam, measured against the element's own face.
- Low-resolution logo for the printed size.
- Fine serif or script on taffeta, with a fix that switches to damask.
- Light weights on woven, which come out as single threads.
- Low contrast between text and background: a label is read at arm's length on cloth, not on a bright screen.
- Too many colours on a woven label.
- Care symbols too small to read, and a composition that does not add up.
The check runs as you work. You will see it change the moment you shrink a line of text, which is a faster way to learn the limits than reading about them.
Step 8: Quick Quote, and what we receive
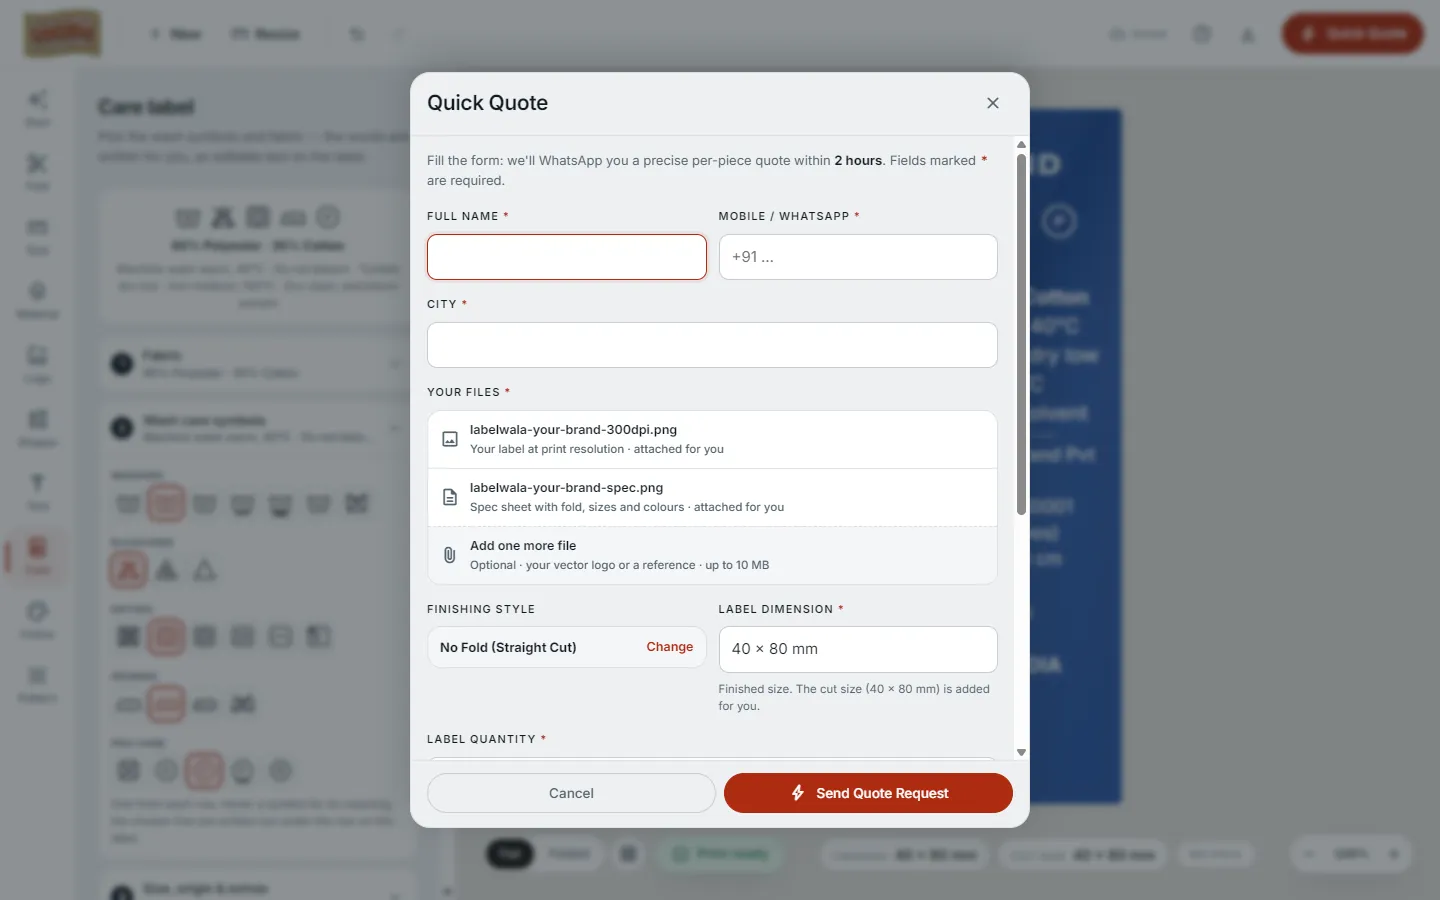
The Quick Quote button opens the same form as our Quick Quote page: name, mobile, city, quantity, address and notes. Two files are attached for you. The first is your label as a PNG rendered at print resolution, at least 2,000 pixels tall, so our studio can zoom into the detail. The second is a one-page spec sheet: fold, finished and cut size, material, background and thread colours, fonts, every line of text with its size, images, and the care and declaration lines if there are any. You can add one more file, your vector logo or a reference photo, if you have one.
We reply on WhatsApp with a per-piece price within two hours on a working day, and before any production run we confirm thread colours and placement and share a sample preview for approval. Nothing is woven from the PNG alone; the spec sheet is what the loom is set from.
Getting your designed label made at Labelwala
We make woven and printed labels in Ahmedabad, Gujarat, and we have been doing it for 25 years. The designer is built on the same rules our pre-press team applies by hand, which is why a design that passes its check usually goes straight to sampling.
- Minimum order: 1,000 pieces per design.
- Quotes: we usually reply within 2 hours on a working day.
- Production: 7-10 days once artwork is approved. Rush jobs run 3-5 days.
- Care symbols: set to ISO 3758, the same set the designer draws.
- Delivery: pan-India, tracked.
We are rated 5.0 on Google from 27 reviews. If you would rather talk it through, send a photo of the garment or an old label on WhatsApp and we will suggest the fold, size and material, then design it with you in the tool.
Which mistakes does the tool catch, and which can it not?
It will catch text on a fold, type below the material floor, a soft logo, a low-contrast palette and a care composition that adds up to 95 percent. It cannot catch a spelling mistake in your brand name or a phone number with a digit missing. Read the spec sheet once before you press Send; every line of text is listed on it in order.
Pre-quote checklist
- Fold chosen for how the garment is sewn, not for looks.
- Finished size checked against the garment position; cut size noted.
- Material chosen; all text at or above its minimum size.
- Logo uploaded as SVG or a large PNG; no white box.
- Two or three colours on woven.
- Care composition totals 100 percent; declarations complete if sold in India.
- Badge reads Print-ready.
- Spec sheet read once for spelling and numbers.
What we would recommend
Start from the ready-made design closest to your garment, set the fold and material before you touch the artwork, and treat the badge as your proofreader. A first-time brand can go from a blank canvas to a print-ready neck label and matching care label in under twenty minutes, and the quote that comes back will be for something we can actually weave. Open the designer and try it with your own logo.